How to Use a Therasage Infrared Mat with Yoga and Recovery Sequences: Practical Session Walkthrough
Introduction
Infrared heat therapy has gained traction among fitness enthusiasts, yogis, and recovery-focused athletes—but knowing how to use an infrared mat effectively alongside movement practices is different from simply turning it on. A Therasage infrared mat can complement yoga and recovery work when integrated thoughtfully, but the real benefit comes from understanding the timing, temperature, sequencing, and safety considerations that matter.
This guide walks you through everything: from initial setup and safety checks to specific yoga flows and recovery protocols designed to work with the mat’s heat, not against it. We’ll cover what the research actually shows about infrared therapy in recovery contexts, how to structure sessions for different goals, and how to troubleshoot common setup or comfort issues.
If you’re considering this investment, our Therasage Infrared Mat Review: Real-World Testing, Benefits, and Downsides covers the mat’s actual performance, pricing, and what independent testing reveals. This article focuses on the how-to—the practical execution that turns a mat into a tool.
Prerequisites and Setup Requirements
Physical Space and Electrical Needs
Before you unbox a Therasage infrared mat, confirm you have the right environment. Therasage mats typically require a standard 110V outlet (US) and draw between 1,000–1,500 watts depending on the model. Check that your circuit can handle the load without tripping; if you’re unsure, consult your home’s electrical panel or have an electrician verify capacity.
You’ll need a dedicated, flat surface—ideally a yoga mat, carpet, or cushioned flooring underneath the Therasage mat itself. Hard tile or concrete directly under the mat can cause uneven heat distribution and discomfort. The mat should be placed in a room with good ventilation; infrared mats don’t produce smoke, but they do generate heat that can make a small, enclosed space uncomfortably warm.
Measure your space. Standard Therasage mats are roughly 3 feet by 6 feet, though sizes vary. Ensure you have at least 6 feet of clear floor space in front of and around the mat so you can move freely during yoga sequences without stepping off the heated surface unexpectedly.
Health Screening and Contraindications
Infrared heat therapy is generally safe for most people, but certain conditions warrant caution or avoidance. According to Cleveland Clinic’s overview of infrared sauna therapy, individuals with uncontrolled high blood pressure, recent heart surgery, or implanted metal devices (like pacemakers) should consult a physician before using infrared mats. Pregnancy, severe dehydration, and active fever are also reasons to skip sessions.
If you take medications that affect heat sensitivity—such as certain blood pressure or thyroid medications—discuss infrared heat exposure with your doctor. The National Center for Complementary and Integrative Health (NCCIH) resource on infrared sauna notes that while research is still evolving, individual responses to heat vary, and medical clearance is prudent if you have any chronic condition.
Temperature Familiarity and Acclimatization
Therasage mats typically operate between 95°F and 158°F (35°C–70°C), depending on the model and your settings. If you’ve never used infrared heat before, start low—around 100°F–110°F—for your first few sessions. Your body needs time to acclimate. Jumping to high temperatures immediately can cause dizziness, nausea, or excessive sweating that interferes with yoga practice.
Consult the official Therasage User Guides for your specific model’s temperature increments and recommended starting settings. Most guides suggest beginning at 110°F and increasing by 5–10°F per session if you’re comfortable.
Hydration and Timing
You’ll be sweating during and after sessions, especially as the mat heats and you move through yoga sequences. Drink 16–20 ounces of water 30 minutes before your session, and have water nearby during practice. After the session, continue hydrating to replace fluid loss.
Avoid eating a large meal 2–3 hours before using the mat; digestion and heat exposure together can cause discomfort. Light snacks are fine, but save substantial meals for after your recovery window.
Step-by-Step Setup and Initial Configuration
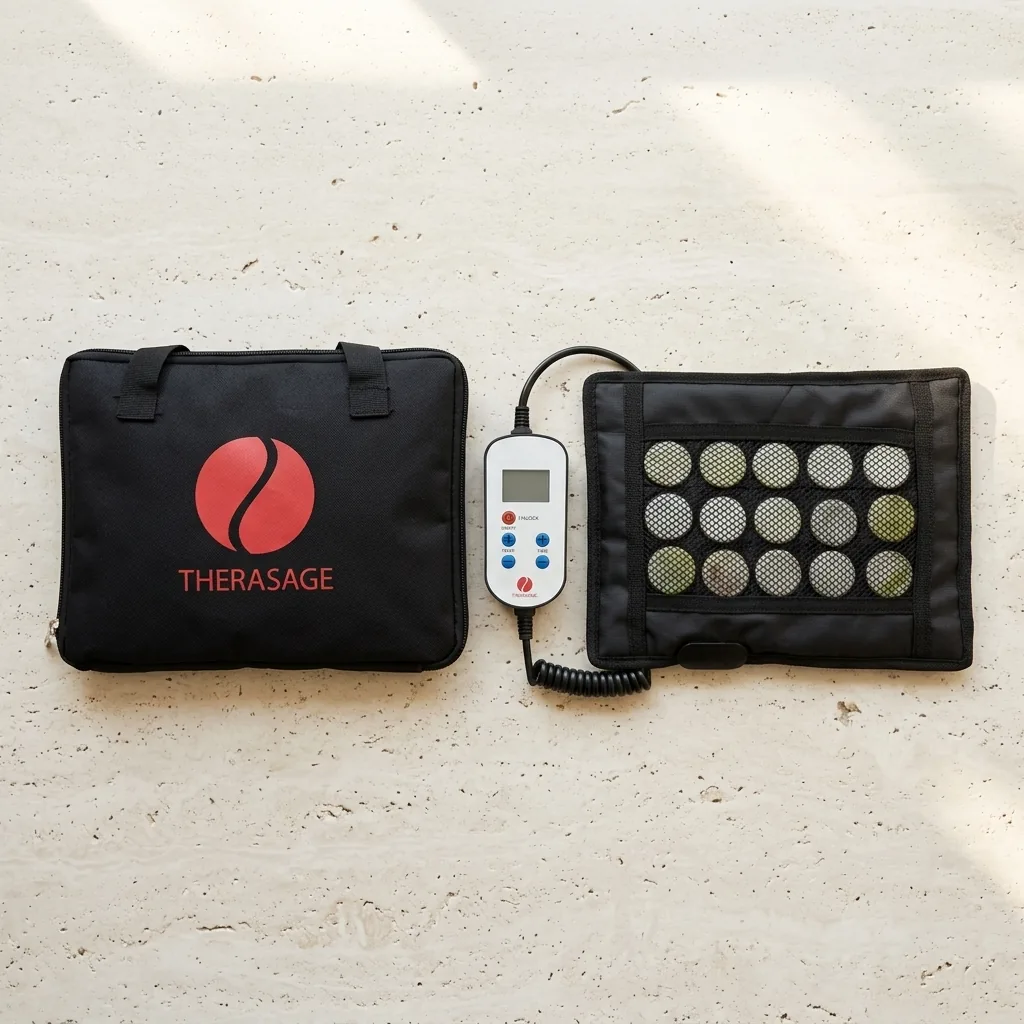
Unboxing and Placement
-
Clear and prepare the floor. Remove any items from your designated mat area. Sweep or vacuum to eliminate dust. Place a yoga mat or cushioned surface underneath where the Therasage mat will rest.
-
Unroll the Therasage mat carefully. Infrared mats contain heating elements; avoid folding or creasing them sharply. Lay it flat on the prepared surface, ensuring it’s fully extended and even.
-
Locate and position the control unit. The control pad or remote is usually connected by a cord. Position it where you can reach it easily while sitting or lying on the mat, but not so close that you’ll accidentally step on it or get tangled in the cord.
-
Check all connections. Verify that the mat’s power cord is securely connected to the control unit and that the control unit is plugged into a grounded outlet. Tug gently on connections to confirm they’re seated.
Powering On and Running the Initial Cycle
-
Turn on the control unit. Press the power button. The display should illuminate, showing the current temperature or default setting. Refer to your model’s manual for the exact button layout.
-
Set the temperature to 100°F–105°F. Use the up/down buttons to adjust. Start low to allow the mat to heat gradually and your body to acclimate. The mat typically reaches target temperature in 5–10 minutes.
-
Let it warm for 10 minutes before use. This allows the heating elements to distribute heat evenly across the mat’s surface. You can use this time to set up your yoga space—arrange props, lay out a towel, and prepare water.
-
Check for even heat distribution. Carefully place your hand (don’t lie down yet) on different areas of the mat—center, edges, corners. The heat should feel relatively uniform. If one area is noticeably hotter or cooler, the mat may need repositioning or there could be a connection issue; consult the manufacturer’s troubleshooting guide.
-
Perform a comfort test. Lie on the mat for 2–3 minutes at this low temperature. Your skin should feel warm, not burning. If it’s too hot, lower the temperature by 5°F. If it’s uncomfortably cool, increase by 5°F.
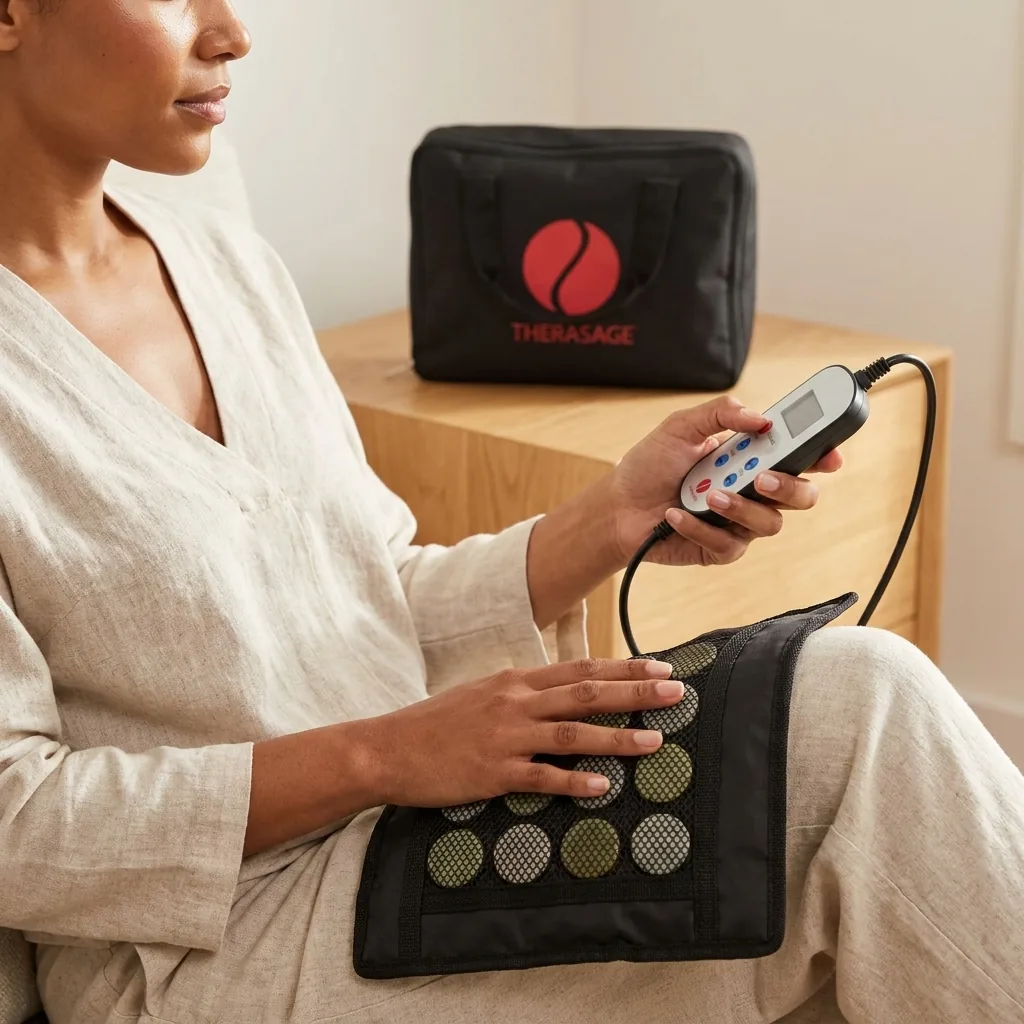
Familiarizing Yourself with Controls
- Temperature display: Most Therasage units show current temperature. Know how to read it and adjust it.
- Timer function: Many models include a timer; set it to your intended session length (typically 20–40 minutes for yoga and recovery).
- Auto-shutoff: Confirm your model has an auto-shutoff feature and understand how long it takes to activate (usually 30 minutes of inactivity).
- Emergency power-off: Locate the power button to kill the unit immediately if needed.
Refer to the official Therasage User Guides for model-specific details.
Understanding Infrared Heat and Recovery Science
Before moving into sequences, it’s worth understanding what infrared heat actually does and what the evidence shows. This context will help you structure sessions that genuinely support recovery rather than just feel pleasant.
How Infrared Heat Works
Infrared radiation penetrates the skin to a depth of about 1.5 inches, warming tissue directly rather than just heating the air around you (as a traditional sauna does). This deeper penetration is why infrared mats are marketed for muscle recovery, joint comfort, and circulation. The heat causes blood vessels to dilate, increasing blood flow to affected areas, which can reduce muscle tension and support nutrient delivery.
What Research Actually Shows
According to Harvard Health Publishing’s evidence review on infrared saunas, the research on infrared heat therapy is mixed and often limited by small sample sizes. Some studies suggest benefits for muscle soreness, circulation, and relaxation, but high-quality, large-scale trials are lacking. Memorial Sloan Kettering’s integrative medicine overview notes that while infrared heat is generally safe, claims about disease prevention or treatment are not well-supported.
For recovery specifically, a peer-reviewed review in Frontiers in Sports and Active Living found that heat therapy (including infrared exposure) can reduce perceived muscle soreness and may support flexibility when combined with movement. The effect is modest and works best as part of a broader recovery protocol—not as a standalone fix.
The takeaway: infrared mats can be a useful complement to yoga and recovery work, enhancing relaxation and potentially reducing post-exercise muscle tension, but they’re not a substitute for proper warm-up, cool-down, or injury prevention.
Integration with Yoga and Movement
Yoga and infrared heat synergize in specific ways:
- Warm tissues respond better to stretching. Heated muscles are more pliable, so you may achieve deeper stretches during yoga on a warm mat.
- Heat reduces guarding. Tight muscles that instinctively contract often relax when warmed, allowing you to access poses more fully.
- Recovery is enhanced post-exertion. Using the mat during cool-down or recovery yoga after a workout supports the body’s natural recovery processes.
- Parasympathetic activation. The combination of gentle heat and slow, mindful movement (yoga) activates the nervous system’s rest-and-digest response, which supports overall recovery.
However, combining heat with vigorous movement can increase core body temperature quickly; this is fine for most people but requires awareness of hydration and duration.
Pre-Session Preparation and Safety Checklist
30 Minutes Before Your Session
- Hydrate. Drink 16–20 ounces of water.
- Choose appropriate clothing. Wear breathable, moisture-wicking clothing (yoga pants, tank top, or shorts). Avoid heavy fabrics that trap heat.
- Gather props. Lay out blocks, straps, bolsters, or blankets you’ll use during sequences.
- Set the room temperature. Open a window or turn on a fan to maintain air circulation. The mat will warm the room; you don’t want it to become stifling.
- Clear your schedule. Ensure you have uninterrupted time—at least 45 minutes for a full session (warm-up, sequence, cool-down).
Immediately Before Starting
- Remove jewelry and watches. Metal conducts heat and can become uncomfortably warm.
- Check your mat one more time. Verify it’s clean, dry, and fully extended.
- Turn on the mat and set temperature. Use your target temperature (start at 105°F–110°F if new to this).
- Allow 10 minutes for warm-up. The mat should reach temperature by the time you’re ready to begin.
- Perform a final self-check. How’s your energy level? Any dizziness, unusual symptoms? If something feels off, skip the session or lower the temperature.
Safety Rules (Non-Negotiable)
- Never lie on the mat for more than 40 minutes continuously. Extended exposure can cause dehydration and overheating.
- Don’t use the mat if you’re sick, feverish, or severely dehydrated. Heat will worsen these conditions.
- Keep water within arm’s reach at all times.
- If you feel dizzy, nauseous, or your heart races, stop immediately. Turn off the mat, lie flat with your feet elevated, and drink water.
- Don’t fall asleep on the mat. It’s easy to lose track of time and overheat.
- Never use the mat on the highest temperature setting for your first sessions. Work up gradually.
For additional context on how to evaluate infrared therapy devices before committing to regular use, our guide on How to Evaluate PEMF and Infrared Therapy Devices Before You Buy covers what to test and what marketing claims to be skeptical of.
Session Structure: Anatomy of a Complete Session
A well-designed session using the Therasage mat typically follows this arc: arrival and settling, warm-up, main sequence, cool-down, and integration. Each phase has a specific purpose and timing.
Phase 1: Arrival and Nervous System Settling (5 Minutes)
Temperature: 105°F–110°F
- Arrive on the mat and sit comfortably. Cross-legged, kneeling, or in a chair—whatever feels stable.
- Close your eyes and take 10 deep breaths. Inhale for a count of 4, hold for a count of 4, exhale for a count of 6. This activates the parasympathetic nervous system and signals to your body that this is a recovery session, not a performance.
- Notice the sensation of warmth. Don’t judge it; simply observe. This builds body awareness and helps you tune into what the heat is actually doing rather than what you think it should do.
- Set an intention. Silently state why you’re here: I’m here to recover, to release tension, to support my body’s healing. This mental framing enhances the session’s benefit.
Phase 2: Gentle Warm-Up (5–7 Minutes)
Temperature: 105°F–115°F (increase by 5°F if comfortable)
The goal here is to begin moving gently, warming muscles further, and preparing your nervous system for deeper stretching.
Sequence:
- Neck rolls: Sit upright, drop your chin to your chest, and slowly roll your head in circles—five rolls each direction. Move deliberately; don’t rush.
- Shoulder rolls: Roll shoulders backward five times, then forward five times.
- Seated spinal twists: Sit cross-legged, place your right hand behind you and your left hand on your right knee, and gently twist to the right. Hold for 10 breaths, then switch sides.
- Cat-cow stretches (modified): Move onto hands and knees on the mat. Inhale, drop your belly and lift your gaze (cow). Exhale, round your spine and tuck your chin (cat). Flow between these five times, moving with your breath.
- Child’s pose: From hands and knees, sink your hips back to your heels, extend your arms forward, and rest your forehead on the mat. Breathe deeply for 30 seconds.
Phase 3: Main Sequence—Restorative Yoga Flow (20–25 Minutes)
Temperature: 110°F–120°F (increase if you’ve acclimated well)
This is the heart of the session. The following sequence emphasizes gentle, sustained stretches that benefit from the mat’s heat. Each pose is held for 1–2 minutes to allow muscles to relax fully.
Sequence:
1. Reclined Butterfly Pose (Supta Baddha Konasana)
- Lie on your back on the mat, knees bent, soles of feet together, knees falling open to the sides.
- Place a bolster or rolled towel under your spine if it feels better on your back.
- Rest your arms at your sides, palms up.
- Hold for 2 minutes. This opens the hips and chest while allowing the mat’s heat to penetrate the hip flexors and lower back.
2. Reclined Spinal Twist
- From your back, draw your right knee toward your chest.
- Cross your right knee over your left side of your body, keeping your right shoulder on the mat.
- Extend your right arm out to the side.
- Hold for 1.5 minutes, then switch sides.
- This pose releases tension in the IT band, glutes, and lower back—areas that hold stress and fatigue.
3. Supported Hamstring Stretch
- Lie on your back, knees bent, feet flat.
- Extend your right leg toward the ceiling, keeping your left foot on the mat.
- If flexible, reach toward your right foot; if not, loop a strap around your right foot and hold the strap.
- Keep your lower back on the mat (don’t let your hips tilt).
- Hold for 2 minutes, then switch.
- The heat softens hamstring tension, which accumulates from sitting and running.
4. Happy Baby Pose
- Lie on your back, bring both knees toward your chest.
- Grab the outside edges of your feet (or your shins if you can’t reach your feet).
- Gently press your knees toward your armpits.
- Hold for 1.5 minutes.
- This opens the hips and lower back, releasing deep tension.
5. Supine Figure-Four Stretch
- Lie on your back, left knee bent, left foot on the mat.
- Cross your right ankle over your left thigh, just above the knee.
- Gently draw your left knee toward your chest, feeling a stretch in your right hip.
- Hold for 2 minutes, then switch.
- This targets the piriformis and hip external rotators.
6. Legs-Up-the-Wall Variation (Modified)
- If your mat is against a wall, extend your legs up the wall while lying on your back, your torso on the mat.
- If not, simply lie on your back with your legs extended and slightly elevated on a bolster or pillow.
- Rest your arms at your sides, palms up.
- Hold for 2 minutes.
- This pose reverses the effects of standing and sitting, reducing swelling in the legs and promoting circulation.
Phase 4: Cool-Down and Integration (8–10 Minutes)
Temperature: 105°F–110°F (lower if you feel warm)
As you wind down, the goal is to deepen relaxation, lower your core body temperature slightly, and transition back to normal activity.
Sequence:
1. Constructive Rest Position
- Lie on your back, knees bent, feet flat on the mat, hip-width apart, about 12 inches from your buttocks.
- Arms rest at your sides, palms down.
- Stay here for 3 minutes, breathing naturally.
- This neutral position allows your nervous system to integrate the work you’ve done.
2. Guided Body Scan (3 Minutes)
- Still lying down, close your eyes.
- Starting at the top of your head, mentally scan downward: forehead, eyes, jaw, neck, shoulders, arms, hands, chest, belly, hips, legs, feet.
- Notice where you feel warmth, tension, or ease. Don’t try to change anything; simply observe.
- This builds proprioceptive awareness and deepens the relaxation response.
3. Transition to Seated
- Slowly roll onto your right side, rest there for a few breaths.
- Press yourself up to a seated position using your hands.
- Don’t rush; your blood pressure may take a moment to adjust after lying down.
- Sit quietly for 1 minute.
4. Final Breath Work (Alternate Nostril Breathing)
- Sit comfortably, spine upright.
- Close your right nostril with your right thumb, inhale through your left nostril for a count of 4.
- Close your left nostril with your right ring finger, exhale through your right nostril for a count of 4.
- Repeat 10 times.
- This balances the nervous system and signals the end of the session.
Turning Off the Mat and Post-Session Care
- Turn off the mat. Press the power button on the control unit.
- Cool down gradually. Don’t immediately jump into a cold shower. Sit in a cool room for 5–10 minutes, allowing your body temperature to normalize.
- Drink water. Consume 16–20 ounces over the next 30 minutes.
- Avoid strenuous activity for at least 1 hour. Your body is in a recovery state; let it rest.
- Eat a light, balanced snack if hungry. Fruit, nuts, or yogurt are good choices.
Advanced Sequences for Specific Goals
Once you’re comfortable with the basic restorative flow, you can tailor sessions to specific recovery needs.
Sequence A: Post-Workout Recovery (30 Minutes)
Use this after cardio, strength training, or intense yoga.
Temperature: 110°F–120°F
- Warm-up (5 min): Gentle movement, breathing, intention-setting.
- Main sequence (18 min): Focus on areas you worked: hamstring stretches if you ran, hip openers if you did leg day, shoulder and chest stretches if you lifted upper body. Hold each pose 2 minutes.
- Cool-down (7 min): Constructive rest, body scan, alternate nostril breathing.
Key principle: Heat accelerates blood flow to fatigued muscles, delivering oxygen and nutrients while flushing metabolic waste. Research published in Frontiers in Sports and Active Living supports the use of heat therapy in the 30 minutes to 2 hours post-exercise window for perceived recovery and muscle soreness reduction.
Sequence B: Chronic Tension Release (35 Minutes)
Use this for neck, shoulder, or lower back tension that’s accumulated over days or weeks.
Temperature: 115°F–125°F (higher heat allows deeper relaxation)
- Warm-up (5 min): Slow neck rolls, shoulder rolls, and gentle spinal twists.
- Main sequence (22 min): Extended holds in poses that target your problem area. For neck/shoulders: supported fish pose (chest opener), cow-face pose (shoulder stretch), reverse prayer pose. For lower back: reclined twists, sphinx pose, supported bridge pose. For each, hold 2–3 minutes.
- Cool-down (8 min): Longer body scan, extended final breathing.
Sequence C: Sleep Preparation (20 Minutes)
Use this in the evening to promote deep, restorative sleep.
Temperature: 105°F–110°F (keep it moderate; too much heat can be stimulating)
- Warm-up (3 min): Slow, deliberate breathing and gentle stretching.
- Main sequence (12 min): Reclined butterfly, legs-up-the-wall, child’s pose, constructive rest. Minimal transitions; stay in each pose 2–3 minutes.
- Cool-down (5 min): Extended body scan, 4-7-8 breathing (inhale for 4, hold for 7, exhale for 8), eyes-closed rest.
According to NIAMS guidance on exercise and recovery, gentle, warm-based movement before bed supports the natural sleep cycle by promoting parasympathetic activation.
Sequence D: Mobility and Flexibility Building (40 Minutes)
Use this 2–3 times per week to gradually increase your range of motion.
Temperature: 115°F–120°F
- Warm-up (5 min): Dynamic stretches, cat-cow, child’s pose.
- Main sequence (28 min): Longer holds in deep stretches. Move slowly between poses. Include deep hip openers (pigeon pose, reclined figure-four), hamstring and calf stretches, shoulder and chest openers, and spinal twists. Each pose 2–3 minutes, with conscious breathing to relax into the stretch.
- Cool-down (7 min): Constructive rest, body scan, final breathing.
Key principle: Muscles lengthen more readily when warm. Consistent practice on the heated mat, combined with mindful breathing and time, gradually increases flexibility. Avoid forcing; let the heat and time do the work.
Troubleshooting Common Issues
The Mat Doesn’t Heat Evenly
Symptom: One section of the mat is noticeably hotter than others.
Causes and fixes:
- Uneven weight distribution: If you’re lying on one side, that area will feel hotter. Shift your weight periodically.
- Carpet or padding underneath is uneven: Smooth out the surface beneath the mat.
- Power cord isn’t fully connected: Check connections at both the mat and the control unit. Reseat firmly.
- Control unit malfunction: If one section is consistently cold despite a fully connected cord, the heating element in that zone may be failing. Contact Therasage support.
You Feel Dizzy or Nauseous During Sessions
Causes and fixes:
- Dehydration: Drink water immediately and lower the mat temperature by 10°F. In future sessions, hydrate more before starting.
- Low blood sugar: Eat a light snack before the session (banana, handful of nuts).
- Overheating: Turn off the mat, lie flat with your feet elevated, and cool down. In future sessions, use a lower temperature or shorter duration.
- Underlying condition: If dizziness persists even at low temperatures, consult your doctor before using the mat again.
The Mat Feels Too Hot, Even at Low Temperatures
Causes and fixes:
- Your skin is too sensitive: Start with clothing between your skin and the mat (yoga pants, long-sleeve shirt) for the first few sessions. Gradually transition to less coverage as you acclimate.
- The room is too warm: Open a window or turn on a fan to improve air circulation.
- You’re using too high a temperature for your experience level: Drop the temperature by 10°F and focus on acclimating over several sessions before increasing again.
You’re Not Sweating (Is the Mat Working?)
Context: Not sweating doesn’t mean the mat isn’t working. Sweating is one response to heat, but it’s not the only benefit. Muscle relaxation, improved circulation, and nervous system activation happen regardless of perspiration.
If you want to verify the mat is heating:
- Place your hand on the mat’s surface for 10 seconds; it should feel noticeably warm.
- Check the control unit’s temperature display; it should show a temperature above ambient room temperature.
- Use a non-contact infrared thermometer to measure the mat’s surface temperature (should match the display).
The Control Unit Won’t Turn On
Causes and fixes:
- Power outlet issue: Plug a lamp or phone charger into the same outlet. If that doesn’t work, the outlet is dead; try a different outlet.
- Cord isn’t fully inserted: Reseat the power cord into the control unit.
- Circuit breaker tripped: Check your home’s electrical panel; flip the breaker back on if needed.
- Control unit malfunction: If the unit still won’t power on after these checks, contact Therasage customer support with your model number and purchase date.
You Feel Sore or Stiff After Sessions
Context: This is unusual but can happen if you’re pushing too hard into stretches while the mat is on.
Fixes:
- Ease into stretches more gently. The heat makes muscles more pliable, but that doesn’t mean you should force them. Breathe into stretches; don’t bounce or strain.
- Reduce session length. If you’re doing 40-minute sessions, try 25 minutes instead.
- Lower the temperature. A less intense heat may feel more comfortable while you’re learning your body’s limits.
- Check your form. Review the pose descriptions above; incorrect alignment can cause discomfort. Consider a yoga video or instructor feedback.
Frequency, Duration, and Long-Term Use
Recommended Frequency
- Beginners (first 2 weeks): 2–3 sessions per week, 20–25 minutes each, at 105°F–110°F. This allows your body to acclimate without overdoing it.
- Intermediate (weeks 3–8): 3–4 sessions per week, 25–35 minutes each, at 110°F–120°F. You can now handle longer sessions and higher temperatures.
- Advanced (beyond 8 weeks): 3–5 sessions per week, 30–40 minutes each, at temperatures you’ve found comfortable. Some people use the mat daily on a rotating schedule (e.g., 40 minutes one day, 20 minutes the next).
Duration Guidelines
- Minimum: 20 minutes to feel meaningful effects.
- Sweet spot: 25–35 minutes for most people; this balances benefit and time investment.
- Maximum: 40 minutes continuously. Beyond this, dehydration and overheating risk increases.
Signs You Need a Break
- Persistent dizziness or headaches after sessions.
- Skin irritation or redness that doesn’t fade within an hour.
- Feeling unusually fatigued or weak the day after sessions.
- Any sign of heat exhaustion (confusion, rapid heartbeat, extreme fatigue).
If any of these occur, skip sessions for a few days, then resume at a lower temperature and shorter duration.
Combining the Mat with Other Recovery Modalities
The Therasage infrared mat works well alongside other recovery practices. Here’s how to integrate them:
Infrared Mat + Foam Rolling
Sequence: Foam roll first (5–10 minutes) to release muscle knots, then use the infrared mat (25–35 minutes) to relax the tissues you’ve worked on. The heat accelerates recovery from the rolling stimulus.
Infrared Mat + Cold Exposure
Sequence: Use the infrared mat first (30 minutes), then finish with a 1–2 minute cold shower or ice bath if you’re trained in contrast therapy. This contrast activates circulation and the parasympathetic nervous system. Caution: Only do this if you have medical clearance and experience with cold exposure.
Infrared Mat + Massage or Bodywork
Sequence: Get a massage or bodywork session, then use the infrared mat the same day (24 hours later) to support continued recovery. The heat enhances the benefits of manual therapy by improving circulation to worked tissues.
Infrared Mat + Meditation or Breathwork
Sequence: Combine them within the same session. Use the mat’s warmth as a backdrop for a guided meditation or extended breathwork practice. The heat supports relaxation, making meditation deeper.
What the Evidence Actually Shows (And What It Doesn’t)
To set realistic expectations, it’s important to understand what research supports and what remains unclear.
What’s Supported
- Muscle relaxation: Heat causes muscles to relax, which is why you feel looser after sessions.
- Improved circulation: Infrared heat dilates blood vessels, increasing blood flow.
- Reduced perceived muscle soreness: Studies show modest reductions in delayed-onset muscle soreness (DOMS) when heat is applied post-exercise.
- Relaxation and stress reduction: The combination of heat and gentle movement activates the parasympathetic nervous system.
What’s Not Well-Supported
- Disease treatment or prevention: Claims that infrared mats cure or prevent cancer, heart disease, or other serious conditions are not backed by strong evidence. Memorial Sloan Kettering’s review and Harvard Health’s evidence summary both note that high-quality, large-scale studies are lacking.
- Detoxification: The idea that sweating “removes toxins” is a myth. Your liver and kidneys handle detoxification; sweating is just a cooling mechanism.
- Permanent flexibility gains: Stretching on a warm mat feels easier, but gains are temporary unless you practice consistently over months.
- Weight loss: Infrared mats don’t burn significant calories. Any weight loss from regular use is likely due to increased activity and improved recovery, not the heat itself.
For a comprehensive, evidence-based assessment of what infrared therapy can and can’t do, our Therasage Infrared Mat Review covers real-world testing and separates marketing claims from research.
Final Checklist: Before Your First Session
Use this list to ensure you’re ready:
- Medical clearance obtained (if you have any chronic conditions).
- Electrical outlet tested and confirmed to work.
- Mat unrolled, positioned, and connections verified.
- Room ventilated and at a comfortable ambient temperature.
- Water bottle filled and within reach.
- Yoga props (blocks, straps, bolster) gathered.
- Clothing chosen (breathable, moisture-wicking).
- Jewelry and watches removed.
- Schedule cleared for 45 minutes of uninterrupted time.
- Mat powered on, temperature set to 105°F–110°F, allowed 10 minutes to warm.
- Final self-check: no dizziness, unusual symptoms, or concerns.
Conclusion
Using a Therasage infrared mat effectively isn’t just about turning it on and lying down. It’s about understanding how heat affects your body, structuring sessions that serve your recovery goals, respecting safety guidelines, and integrating the mat thoughtfully into a broader wellness practice. The sequences outlined here—from gentle restorative flows to targeted recovery work—are designed to maximize the mat’s benefits while minimizing risks.
Start low with temperature and duration, listen to your body, and build gradually. Over weeks and months, you’ll develop an intuitive sense of what your body needs: some days a short, gentle session; other days a longer, deeper practice. That attunement is the real skill.
For more insight into whether an infrared mat is right for you in the first place, our Therasage Infrared Mat Review covers the mat’s actual performance, durability, and value. And if you’re comparing infrared therapy to other recovery tools, our guide on How to Evaluate PEMF and Infrared Therapy Devices Before You Buy walks you through what to test and what claims to scrutinize.
The infrared mat is a tool. Used thoughtfully with yoga and recovery practices, it can support your body’s natural healing. Used carelessly, it’s just an expensive blanket. This guide aims to help you be in the former camp.
Sources
- Therasage User Guides. https://therasage.com/pages/user-guides
- National Center for Complementary and Integrative Health (NCCIH): Infrared Sauna. https://www.nccih.nih.gov/health/infrared-sauna
- Memorial Sloan Kettering Cancer Center: Infrared Sauna. https://www.mskcc.org/cancer-care/integrative-medicine/herbs/infrared-sauna
- Cleveland Clinic: Infrared Sauna. https://my.clevelandclinic.org/health/treatments/infrared-sauna
- Harvard Health Publishing: Infrared Saunas, a Heated Debate. https://www.health.harvard.edu/staying-healthy/infrared-saunas-a-heated-debate
- Frontiers in Sports and Active Living: Heat therapy and sports recovery. https://www.frontiersin.org/articles/10.3389/fspor.2020.00025/full
- ScienceDirect: Far-infrared radiation in medicine and rehabilitation. https://www.sciencedirect.com/science/article/pii/S2095254618300408
- PubMed: Regular sauna bathing and cardiovascular health. https://www.ncbi.nlm.nih.gov/pmc/articles/PMC4937411/
- National Institute of Arthritis and Musculoskeletal and Skin Diseases (NIAMS): Exercise and Physical Activity. https://www.niams.nih.gov/health-topics/exercise-and-physical-activity
Ashley Isham
 Health and wellness
How to Evaluate PEMF and Infrared Therapy Devices Before You Buy
Health and wellness
How to Evaluate PEMF and Infrared Therapy Devices Before You Buy
 Health and wellness
Therasage Infrared Mat Review: Real-World Testing, Benefits, and Downsides
Health and wellness
Therasage Infrared Mat Review: Real-World Testing, Benefits, and Downsides
 Health and wellness
Complete Guide to Choosing an Infrared Sauna Blanket: Therasage Features, Safety, and Evidence
Health and wellness
Complete Guide to Choosing an Infrared Sauna Blanket: Therasage Features, Safety, and Evidence