Test Your Power Bank’s True Capacity at Home: USB Load and Multimeter Method
Why Testing Power Bank Capacity Matters
Portable power banks are one of the most frequently misrepresented products on the market. Manufacturers routinely advertise inflated capacity figures—claiming 20,000 mAh when the real usable capacity is closer to 12,000 mAh. The gap between advertised and actual capacity can be shocking, which is why independent testing is critical before you buy.
At Unbias Review, we’ve tested dozens of power banks using hands-on methodology to separate marketing claims from reality. But you don’t need professional lab equipment to verify a power bank’s true capacity yourself. With a USB load tester, a multimeter, and about an hour of your time, you can measure the real energy output and compare it against what the manufacturer claims.
This guide walks you through the exact process we use—the same methodology that helps us deliver honest product reviews without hype. Whether you’re evaluating a power bank before purchase or verifying one you already own, this step-by-step approach gives you the data you need to make an informed decision.
Prerequisites: What You’ll Need

Before you start, gather these tools and materials. All are affordable and widely available online.
Essential Equipment:
- USB Power Meter — A digital device that measures voltage, current, and wattage in real-time. Popular models include the Charger Doctor, USB Power Meter, or similar inline testers (typically $10–30). This is your primary measurement tool.
- USB Load Resistor (Dummy Load) — A resistive load that draws a controlled current from the power bank without charging a real device. You can buy a pre-made USB dummy load (around $15–25) or build one from a 5-ohm resistor rated for at least 2.5W (more on DIY options below).
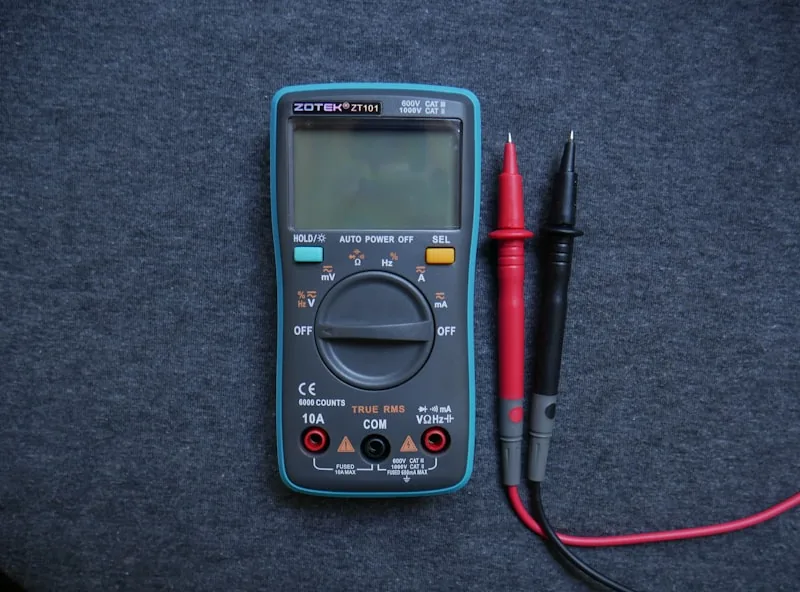
- Digital Multimeter — A basic multimeter ($10–20) that can measure voltage and current. This serves as a backup to verify the USB power meter’s readings.
- The Power Bank Under Test — The device you want to evaluate.
- Fully Charged Power Bank — Make sure it’s at 100% before you begin testing.
- Notebook or Spreadsheet — To record voltage, current, and time readings throughout the discharge cycle.
- USB Cable — A standard USB-A to micro-USB or USB-C cable (depending on the power bank’s input).
Optional but Helpful:
- A temperature sensor or infrared thermometer to monitor the power bank’s temperature during discharge (helps spot thermal throttling).
- A timer or stopwatch app to track discharge time precisely.
- A second multimeter for simultaneous voltage and current measurement.
If you want to dive deeper into battery testing concepts, Battery University’s guide to measuring battery capacity provides excellent background on discharge testing and watt-hour calculations.
Understanding Power Bank Capacity: mAh vs. Wh
Before you test, understand the difference between the two capacity metrics manufacturers use—and why one is far more honest than the other.
Milliamp-hours (mAh) is what most power banks advertise. A 20,000 mAh power bank claims it can deliver 20 amps for one hour, or 1 amp for 20 hours. But mAh is misleading because it ignores voltage. The same mAh rating at 3.7V (the nominal voltage of a lithium cell) stores less total energy than the same mAh at 5V (the USB output voltage).
Watt-hours (Wh) is the honest metric. It measures total energy: Wh = mAh × V ÷ 1000. A 20,000 mAh power bank at 3.7V nominal stores about 74 Wh of energy internally—but when it boosts that to 5V output, the actual deliverable energy is closer to 50–60 Wh due to inverter losses (typically 85–90% efficient).
When you test, you’ll measure the actual watt-hours delivered to a USB load. This is the number that matters for real-world charging. For a deeper understanding of battery measurement methodology, Tektronix’s article on battery capacity testing explains the technical foundations.
Step 1: Prepare Your Testing Environment
Set up a clean, safe workspace before you begin.
Location: Choose a well-ventilated area at room temperature (ideally 68–75°F / 20–24°C). Avoid direct sunlight or heat sources. Lithium batteries can generate heat during discharge, and you want a stable baseline.
Safety First: Ensure your workspace is dry. Never test near water or flammable materials. If the power bank becomes hot to the touch (above 113°F / 45°C), stop the test immediately. This indicates a fault or thermal runaway risk.
Clear the Workspace: Remove clutter so you can monitor the power meter and multimeter readings clearly. Position your USB power meter where you can see the display without moving cables.
Ground Yourself: Touch a grounded metal object or wear an anti-static wrist strap if available. This prevents accidental static discharge that could damage sensitive electronics.
Document Your Setup: Take a photo of your test configuration. This helps you replicate the test later and provides evidence of your methodology.
Step 2: Build or Verify Your USB Dummy Load
A dummy load is a resistor that draws power from the USB port without charging a real device. You need this to simulate a consistent, measurable load.
Option A: Buy a Pre-Made USB Dummy Load
The easiest approach. Search for “USB dummy load” or “USB electronic load” online. These typically feature:
- Adjustable current settings (1A, 2A, 3A, etc.).
- A display showing voltage and current.
- USB-A connector for inline connection.
Pre-made loads cost $20–50 and eliminate guesswork. Popular models include the RD Tech USB Load and similar devices from electronics suppliers.
Option B: DIY Resistive Load
If you prefer to build one, you’ll need:
- A 5-ohm resistor rated for at least 2.5W continuous power (a 5W resistor is safer).
- A USB-A male connector or cable you can modify.
- Electrical solder and a soldering iron.
- Heat shrink tubing for insulation.
Wiring: Solder the 5-ohm resistor between the USB +5V (red) and GND (black) lines. The +Data and -Data lines (green and white) can be left unconnected or shorted together. At 5V, a 5-ohm load draws 1A of current (P = V²/R = 25/5 = 5W).
Caution: DIY loads get hot. The resistor will dissipate 5W as heat. Use a heatsink or allow cooling periods. Never touch the resistor during operation.
Verification: Before testing your power bank, verify the load with a multimeter. Connect it to a known USB power supply (a phone charger, for example) and measure the current draw. A 5-ohm load should draw close to 1A at 5V.
For detailed background on USB power behavior and load considerations, Adafruit’s guide to USB power and LiPoly chargers covers the technical details of USB power-path behavior and measurement.
Step 3: Connect Your Measurement Chain
Now assemble the test circuit: Power Bank → USB Power Meter → USB Dummy Load.
Connection Order:
- Plug the USB power meter into the power bank’s USB output port.
- Connect the dummy load to the USB power meter’s output.
- Ensure all connections are secure and there are no loose wires.
Verify Initial Readings:
Before starting the discharge test, check that your USB power meter is displaying:
- Voltage: Should read approximately 5.0–5.2V (standard USB).
- Current: Should show the expected load current (e.g., ~1A for a 5-ohm resistor).
- Power: Should calculate as Voltage × Current (e.g., 5V × 1A = 5W).
If any reading is zero or obviously wrong, disconnect and recheck your connections. A loose contact will skew your entire test.
Multimeter Setup (Optional Backup):
If you’re using a multimeter as a secondary measurement, connect it in parallel with the USB power meter to measure voltage. Set it to the DC voltage range (usually marked “VDC” or “V=”). Clamp the leads across the +5V and GND lines of the dummy load.
Step 4: Record Your Baseline (Fully Charged State)
Before discharge begins, document the power bank’s starting condition.
Initial Measurements:
- Power Bank Charge Level: Should be 100% if possible. If the power bank has an LED indicator, it should show full.
- Voltage Output: Record the USB output voltage from the power meter (should be 5.0–5.2V).
- Current Draw: Note the current the dummy load is pulling (e.g., 1.0A).
- Wattage: Record the power (Voltage × Current).
- Time: Note the exact start time (HH:MM:SS).
- Ambient Temperature: Record the room temperature and the power bank’s surface temperature if you have a thermometer.
Create a Discharge Log:
Set up a simple table in a spreadsheet or notebook with columns for:
- Time elapsed (minutes)
- Voltage (V)
- Current (A)
- Power (W)
- Cumulative energy (Wh)
- Temperature (°C or °F)
- Notes
Example:
| Time (min) | Voltage (V) | Current (A) | Power (W) | Cumulative Wh | Temp (°F) | Notes |
|---|---|---|---|---|---|---|
| 0 | 5.1 | 1.0 | 5.1 | 0 | 72 | Start |
| 5 | 5.1 | 1.0 | 5.1 | 0.43 | 72 | Stable |
| 10 | 5.1 | 1.0 | 5.1 | 0.85 | 73 | Stable |
Step 5: Run the Discharge Test
Now let the power bank discharge into the dummy load. This is the core of your capacity test.
Monitoring Schedule:
- First 30 minutes: Record readings every 5 minutes. This captures the initial behavior and any voltage sag under load.
- 30–120 minutes: Record every 10 minutes. The voltage should remain relatively stable.
- After 120 minutes: Record every 15–30 minutes. The power bank will begin to deplete, and voltage may drop.
- Final 10% of capacity: Record every 5 minutes again. This captures the voltage collapse as the battery dies.
What to Watch For:
- Voltage Stability: The USB output should hold steady at 5.0–5.2V for most of the discharge. A sudden drop indicates the battery is nearly depleted.
- Current Stability: The current should remain constant if you’re using a fixed resistive load. If current drops while voltage is stable, the load connection may be failing.
- Temperature: Monitor for excessive heat. If the power bank exceeds 113°F (45°C), stop and let it cool. Continued discharge at high temperature can damage the battery.
- Unusual Behavior: If the voltage fluctuates wildly, the current cuts out, or the device becomes very hot, disconnect immediately. These are signs of a defective unit.
Typical Discharge Profile:
Most power banks follow this pattern:
1. Constant Voltage Phase (0–80% discharge): Voltage stays near 5.1V, current remains constant.
2. Voltage Sag Phase (80–95% discharge): Voltage begins to drop noticeably (5.0V → 4.8V → 4.5V).
3. Collapse Phase (95–100% discharge): Voltage drops rapidly. The power meter or power bank’s protection circuit cuts off the output.
The test ends when the USB power meter reads 0A (no current) or the voltage drops below 4.5V (most power banks shut down here).
Step 6: Calculate Total Energy Delivered
Once the discharge is complete, calculate the total watt-hours (Wh) your power bank delivered.
Method 1: Trapezoidal Integration (Most Accurate)
If you recorded power (watts) at regular intervals, use the trapezoidal rule to estimate total energy:
Wh = (Average Power) × (Total Time in Hours)
Or more precisely:
Wh = Σ [(P₁ + P₂) / 2 × Δt] for each interval
Where P₁ and P₂ are consecutive power readings, and Δt is the time interval in hours.
Example Calculation:
If you recorded these power readings at 10-minute intervals:
- 0 min: 5.1W
- 10 min: 5.1W
- 20 min: 5.0W
- 30 min: 4.8W
- 40 min: 4.5W
- 50 min: 0W (end)
Total time = 50 minutes = 0.833 hours
For each 10-minute (0.167-hour) interval:
- 0–10 min: (5.1 + 5.1) / 2 × 0.167 = 0.85 Wh
- 10–20 min: (5.1 + 5.0) / 2 × 0.167 = 0.85 Wh
- 20–30 min: (5.0 + 4.8) / 2 × 0.167 = 0.82 Wh
- 30–40 min: (4.8 + 4.5) / 2 × 0.167 = 0.77 Wh
- 40–50 min: (4.5 + 0) / 2 × 0.167 = 0.38 Wh
Total = 0.85 + 0.85 + 0.82 + 0.77 + 0.38 = 3.67 Wh
(This is a simplified example; real power banks deliver much more.)
Method 2: USB Power Meter with Built-In Integration
Some advanced USB power meters display cumulative watt-hours directly. If yours does, note the final reading when the power bank shuts off. This is your total delivered energy.
Method 3: Average Power × Time
If you don’t have detailed interval data, estimate:
Wh ≈ (Average Voltage) × (Average Current) × (Total Time in Hours)
For example: 5.0V × 1.0A × 5 hours = 25 Wh
This method is less accurate because it ignores voltage sag, but it gives a reasonable ballpark.
Step 7: Compare Against Advertised Capacity
Now compare your measured result to what the manufacturer claims.
Convert Advertised mAh to Wh:
Most power banks advertise mAh. To convert to watt-hours:
Wh = (mAh × Nominal Voltage) / 1000
The nominal voltage of a lithium cell is 3.7V. So a 20,000 mAh power bank stores:
Wh = (20,000 × 3.7) / 1000 = 74 Wh internally
But the USB output is 5V, and the inverter is typically 85–90% efficient. So the deliverable energy is:
Deliverable Wh ≈ 74 × 0.87 ≈ 64 Wh
Create a Comparison Table:
| Metric | Advertised | Measured | Efficiency | Real Capacity |
|---|---|---|---|---|
| Capacity (mAh) | 20,000 | — | — | — |
| Internal Energy (Wh) | 74 | — | — | — |
| Delivered Energy (Wh) | ~64 (est.) | 52 (measured) | 81% | 52 Wh |
In this example, the power bank delivered 52 Wh instead of the estimated 64 Wh—an 81% efficiency and a 19% shortfall from the theoretical maximum.
Interpret the Results:
- 90%+ of advertised capacity: Honest manufacturer. The power bank is well-designed and efficient.
- 80–90% of advertised capacity: Normal. Some loss to inverter inefficiency and protection circuitry is expected.
- 70–80% of advertised capacity: Weak. The power bank underperforms, but not catastrophically.
- Below 70% of advertised capacity: Major red flag. The power bank is either defective, has degraded, or the manufacturer’s claims are fraudulent.
For a comprehensive framework on how to evaluate product claims versus real-world performance, Unbias Review’s complete framework for unbiased product testing outlines the methodology we use to separate marketing from reality.
Step 8: Test Across Multiple Load Levels (Optional but Valuable)
For a more complete picture, repeat the test at different current draws. This reveals whether the power bank performs consistently or throttles under heavy load.
Common Test Loads:
- 0.5A (Light Load): Simulates charging a smartwatch or small phone.
- 1.0A (Medium Load): Typical smartphone charging speed.
- 2.0A (Heavy Load): Fast charging; stresses the power bank’s inverter.
- 3.0A (Maximum Load): Only if your power bank is rated for it; tests the upper limit.
What to Expect:
Most power banks deliver slightly more total energy at lower currents (better efficiency at lower stress). At higher currents, voltage sag increases, and total delivered energy may drop by 5–15%.
Create a Multi-Load Comparison:
| Load (A) | Discharge Time (min) | Avg Voltage (V) | Total Energy (Wh) | Efficiency (%) |
|---|---|---|---|---|
| 0.5 | 320 | 5.05 | 52.5 | 84 |
| 1.0 | 160 | 5.00 | 52.0 | 83 |
| 2.0 | 80 | 4.92 | 50.5 | 81 |
| 3.0 | 53 | 4.80 | 48.0 | 77 |
This data shows how the power bank’s performance degrades under higher loads—valuable information for real-world use.
Step 9: Document Temperature Behavior
Temperature tells you whether the power bank is well-designed or cutting corners.
What to Monitor:
- Ambient Temperature: Room temperature at the start and end of the test.
- Surface Temperature: The power bank’s exterior temperature, measured every 30 minutes with an infrared thermometer or temperature sensor.
- Temperature Rise: Calculate the difference between the final and initial surface temperature.
Interpret Results:
- Temperature rise of 5–10°F (3–6°C): Normal. The power bank is managing heat well.
- Temperature rise of 10–20°F (6–11°C): Acceptable but warm. The inverter or battery could be more efficient.
- Temperature rise above 20°F (11°C) or surface temp above 113°F (45°C): Warning sign. Excessive heat indicates poor design, low-quality components, or a defect.
Heat is the enemy of lithium batteries. A power bank that runs hot will degrade faster and may pose a safety risk. If you observe excessive temperature, stop the test and allow the device to cool before continuing.
Step 10: Repeat for Consistency
One test gives you one data point. For confidence, repeat the measurement at least twice—ideally with a few days between tests to allow the battery to rest.
Why Repeat?
- Lithium batteries can behave slightly differently on successive discharge cycles.
- Environmental factors (room temperature, humidity) can affect results.
- A single outlier might indicate a measurement error rather than the power bank’s true performance.
Compare Results:
If your two tests deliver 52 Wh and 51 Wh, that’s consistent. If one test shows 52 Wh and another shows 45 Wh, something is wrong—either the power bank is defective, or your measurement setup has an issue.
For additional insights into how to verify product claims through rigorous testing, Unbias Review’s guide on what verified scores mean in product testing explains the importance of repeatable, documented methodology.
Troubleshooting Common Issues
The Power Meter Shows Zero Current
This usually means a loose connection. Check that the USB connectors are fully seated. If the connection is secure, the power bank’s protection circuit may have tripped due to a short or fault. Disconnect and try again after a few minutes.
Voltage Fluctuates Wildly
A poor USB connection causes voltage instability. Ensure the cable is high-quality and fully inserted. If fluctuation continues, the power bank may have an internal problem.
The Power Bank Gets Extremely Hot
Stop the test immediately. Disconnect the load and allow the device to cool for at least 30 minutes. Excessive heat indicates a defect. Do not use this power bank for charging your devices—it may be unsafe.
Discharge Time Is Much Shorter Than Expected
The power bank’s capacity may be lower than advertised, or the protection circuit may be cutting off early due to voltage sag. This is valuable information—it means the advertised capacity is misleading. Document this finding.
The USB Power Meter Itself Seems Inaccurate
Verify it against a known good power supply (like a phone charger) and a multimeter. If the power meter reads differently from the multimeter, the power meter may be faulty. In that case, rely on the multimeter and calculate power manually (P = V × I).
Real-World Application: What This Tells You
Now that you’ve tested your power bank, here’s how to use the data in real life.
Charging Speed Estimation:
If your power bank delivered 50 Wh and you want to charge a 3,000 mAh smartphone battery (11 Wh), you can fully charge that phone approximately 4–5 times—accounting for inverter losses and cable resistance.
Practical Runtime:
If you’re using the power bank at 1A (5W), and it delivered 50 Wh, the runtime is:
Runtime = 50 Wh / 5W = 10 hours
But in practice, you’ll get 8–9 hours because phones don’t charge efficiently at the very end (the charging curve flattens).
Comparison to Competitors:
If you’ve tested multiple power banks, you now have real data to compare. A power bank that delivers 52 Wh is genuinely better than one that delivers 42 Wh—not because of marketing, but because of measured reality.
To see how this testing approach compares real-world performance across popular models, check out Unbias Review’s comparison of SetPower, Nillkin, and Seymac portable power banks, which includes real capacity and charge-speed measurements.
Advanced: Measuring Efficiency Across the Discharge Cycle
If you want to go deeper, you can calculate efficiency at different battery voltage levels.
Why This Matters:
A power bank’s inverter (the circuit that converts 3.7V battery voltage to 5V USB output) becomes less efficient as the battery voltage drops. Tracking this reveals design quality.
Method:
Divide your discharge into voltage bands:
- Band 1 (5.1–4.9V output): Most efficient.
- Band 2 (4.9–4.7V output): Moderate efficiency.
- Band 3 (4.7–4.5V output): Lower efficiency.
- Band 4 (Below 4.5V): Minimal usable capacity.
For each band, calculate the energy delivered (Wh) and compare to the theoretical energy available from the battery at that voltage. The ratio is efficiency.
A well-designed power bank maintains 85%+ efficiency across all voltage bands. A poorly designed one drops to 70% or below in the lower voltage bands.
Key Takeaways
Testing your power bank’s capacity at home is achievable with basic tools. A USB power meter, dummy load, and multimeter cost under $60 combined. The test itself takes 2–5 hours depending on capacity and load.
Advertised capacity is often misleading. Manufacturers quote mAh without accounting for voltage conversion losses. A 20,000 mAh power bank rarely delivers 20,000 mAh worth of USB energy. Measuring watt-hours (Wh) gives you the true picture.
Real-world efficiency varies. Most quality power banks deliver 80–90% of their theoretical capacity. Below 70% indicates either a defect or dishonest marketing. Above 90% is excellent.
Temperature tells you about design quality. A power bank that runs cool is well-engineered. One that gets hot under load is cutting corners or has a defect.
Repeat testing builds confidence. One test is informative; two or three tests confirm the result. If your measurements vary wildly, something is wrong with your setup or the power bank itself.
This methodology applies to all USB-charged devices. Portable speakers, wireless chargers, and other battery-powered gadgets can be tested the same way. The principles of capacity measurement are universal.
When you’re ready to buy a new power bank, you now have the tools to verify claims before you commit. And if you find a power bank that dramatically underperforms its advertising, you have documented evidence to support a return or complaint. That’s the power of honest, hands-on testing.
For more on how Unbias Review approaches rigorous product evaluation, explore our complete buying guide to portable power stations for travel, which includes capacity testing and real-world performance data. You can also learn about our methodology for testing headphones, which applies many of the same principles of transparent, repeatable measurement.
FAQ
Q: Can I test a power bank while it’s charging (during charge-in)?
No. Testing during charge-in introduces variables you can’t control—the charger’s output voltage and current will affect your measurements. Always test a fully charged power bank discharging into a load.
Q: What if my power bank has multiple USB ports? Should I test all of them?
Yes, if you want a complete picture. Different ports may have different voltage regulation or current limits. Test the highest-capacity port first, then others if time allows. Document which port you tested.
Q: How often should I test a power bank?
Once per year if you use it regularly. Lithium batteries degrade over time. Testing annually shows you how much capacity you’ve lost. After 500 charge cycles, expect 80–90% of original capacity. After 1,000 cycles, expect 60–70%.
Q: Can I use a smartphone instead of a dummy load?
Yes, but it’s less controlled. A smartphone’s charging circuit will draw variable current as it charges, making your measurements inconsistent. A dummy load at fixed current gives cleaner data. For a rough test, charging a phone works; for accurate capacity measurement, use a dummy load.
Q: What’s the difference between testing at 1A and 2A?
Higher current stresses the power bank’s inverter and battery more, generating more heat and often resulting in slightly lower total delivered energy. Testing at multiple currents (0.5A, 1A, 2A) shows you how the power bank performs under different real-world conditions.
Q: If my power bank underperforms, is it defective?
Not necessarily. If it delivers 80% of advertised capacity, it’s likely just a case of honest-but-optimistic marketing. If it delivers 50% or less, or if it gets extremely hot, it may be defective or counterfeit. Contact the manufacturer with your test data.
Q: Can I test a power bank with a USB-C port the same way?
Yes. Use a USB-C dummy load or a USB-A to USB-C adapter with your USB-A dummy load. The principle is identical—measure voltage and current, calculate total energy, and compare to advertised capacity.
Q: What’s the safest way to dispose of a power bank that fails testing?
Do not throw it in the trash. Lithium batteries are hazardous and recyclable. Take it to an electronics recycling center, a Best Buy (which accepts batteries), or a manufacturer take-back program. Many battery retailers and manufacturers offer free recycling.
Sources
- BU-903: How to Measure Battery Capacity — Battery University
- Understanding Battery Capacity and How to Test It — Tektronix
- Battery Testing Basics — National Instruments
- How to Measure Battery Capacity — AntonBauch
- USB, DC and Solar LiPoly Chargers — Adafruit
- How to Power Your Project — SparkFun
- USB Power Meter for Testing Capacity of Power Banks — EEVblog Forum
- Power Bank Testing — PowerStream
- Battery Fuel Gauges — Analog Devices
- Keysight Battery Capacity Measurement Application Note