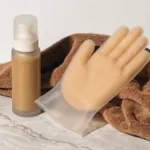
How to Clean Makeup Brushes Properly: A Tested Routine
How to Clean Makeup Brushes Properly: A Tested Routine
Makeup brushes are an investment. Whether you’re using budget-friendly tools or high-end brushes from luxury brands, they deserve proper care to maintain their performance and protect your skin. Yet most people either skip regular cleaning entirely or use methods that damage bristles and reduce brush lifespan. Regularly clean makeup brushes to protect your skin and extend brush life.
At Unbias Review, we’ve tested dozens of brush-cleaning methods, products, and drying techniques to determine what actually works in real-world conditions. This comprehensive guide breaks down the entire process—from prerequisites to pro tips—so you can establish a sustainable cleaning routine that keeps your brushes performing like new. We also emphasize how often to clean makeup brushes for different product types.
Prerequisites: What You Need Before Starting
Before diving into the step-by-step process, gather the right tools and products. Having everything prepared ensures you won’t cut corners or skip steps midway through. These supplies will help you clean makeup brushes effectively without damaging them.
Essential supplies:
- Gentle cleanser: A dedicated brush cleanser, baby shampoo, or mild facial cleanser (we recommend testing gentle options first, as harsh products strip bristles)
- Lukewarm water: Neither hot nor cold—hot water damages bristles and can loosen glue holding bristles together
- Cleansing mat or textured surface: A silicone brush cleaner, textured cleaning pad, or even a microfiber cloth works for agitating product buildup
- Clean towels: Lint-free microfiber towels prevent fibers from sticking to damp bristles
- Drying rack or stand: A brush holder or DIY drying solution (we’ll cover this later) prevents bristles from bending out of shape
- Optional but helpful: Brush conditioning spray, hair conditioner, or olive oil for bristle maintenance after cleaning
If you’re serious about maintaining brushes long-term, invest in a dedicated brush-cleaning system. However, many affordable alternatives work just as well—the key is consistency and proper technique.
Understanding Why Clean Brushes Matter
Before we walk through the steps, it’s worth understanding why regular brush cleaning is non-negotiable. Makeup brushes accumulate bacteria, dead skin cells, product residue, and oils with every use. When you skip cleaning, these contaminants transfer directly to your face, increasing breakout risk and compromising makeup application quality. When you clean makeup brushes regularly, you reduce bacteria transfer and improve product performance.
According to dermatologists and makeup artists featured in guides like How to clean your makeup brushes to avoid unnecessary breakouts from Trinny London, dirty brushes are a leading cause of acne, especially for people with sensitive or acne-prone skin. Beyond hygiene, product buildup clogs bristles, making brushes perform poorly and reducing their lifespan significantly.
Regular cleaning extends brush life by years, improves makeup application, prevents skin irritation, and saves money long-term. It’s one of the simplest investments in both your skin health and beauty routine efficiency.
Step 1: Rinse Brushes Under Running Water
Start with a gentle rinse to remove loose product and surface-level buildup. Always rinse to start when you clean makeup brushes to avoid grinding product into the ferrule.
The process:
Hold your brush under lukewarm running water with bristles pointing downward. Let water flow through the bristles naturally—don’t force water upward into the ferrule (the metal part holding bristles). Water entering the ferrule can loosen the glue binding bristles, causing shedding and bristle loss over time.
Rinse until the water runs relatively clear. This initial rinse removes excess powder, cream, or liquid product, making the deep-cleaning step more effective. For brushes with heavy product buildup, rinse longer and gently squeeze bristles to release trapped product.
Never submerge brushes entirely or soak them. While soaking seems thorough, it forces water into the ferrule and can damage the brush handle if it’s wooden. Quick, targeted rinsing is safer and equally effective.
Step 2: Apply Your Chosen Cleanser
Now it’s time to deep-clean. This step removes bacteria, oils, and stubborn product residue that rinsing alone can’t eliminate. Choosing the right cleanser is key to clean makeup brushes without stripping bristles.
Cleanser options and testing insights:
We’ve tested multiple cleanser types on various brush materials. Here’s what works best:
Dedicated brush cleansers: Products specifically formulated for makeup brushes (like those recommended in How to Properly Clean Your Makeup Brushes from Laura Mercier) offer optimal results. They’re pH-balanced, gentle on bristles, and formulated to dissolve makeup without stripping natural oils.
Baby shampoo: An affordable, effective alternative that’s gentle enough for delicate bristles. We’ve found drugstore baby shampoo works nearly as well as premium brush cleansers at a fraction of the cost.
Mild facial cleansers: Gentle face washes work, but avoid anything with exfoliating particles or strong actives. These can damage bristles over time.
Avoid: Hot water, harsh soaps, and products containing alcohol or strong acids. These strip bristles and cause premature damage.
Application method:
Dispense a small amount of cleanser into your palm or onto a silicone brush-cleaning mat. Wet your brush bristles again with lukewarm water, then swirl and massage the bristles into the cleanser. Work the cleanser through the bristles thoroughly, ensuring it penetrates to the base where bacteria and product accumulate.
For foundation and concealer brushes, spend extra time here—these brushes pick up the most product and require deeper cleaning. Swirl the bristles in circular motions for 15-30 seconds per brush.
Step 3: Agitate and Cleanse on a Textured Surface
This step removes stubborn product buildup that simple swirling can’t dislodge. Agitation techniques vary, but the goal is always to clean makeup brushes thoroughly while being gentle.
Why texture matters:
A textured surface—whether a silicone brush-cleaning pad, microfiber cloth, or even your palm—creates friction that helps release trapped product. The bumps and ridges catch bristles and force product out from between them.
The technique:
With cleanser still on the bristles, gently massage the brush against your textured surface using circular motions. Apply light to moderate pressure—you’re not trying to scrub aggressively, which damages bristles. Instead, you’re using the texture to help cleanser penetrate deeper.
Work from the base of the bristles toward the tips, allowing the texture to separate bristles and release buildup. For natural hair brushes, this step is particularly important since natural bristles hold product more stubbornly than synthetic alternatives.
Continue for 20-30 seconds per brush, or until you feel the bristles are thoroughly cleansed and no longer slippery with product.
Step 4: Rinse Thoroughly Until Water Runs Clear
Rinsing is critical. Any remaining cleanser residue will dry on bristles, making them stiff and compromising application quality. Finish rinsing until the water runs clear to ensure you clean makeup brushes of all soap and residue.
The rinsing process:
Return your brush to running lukewarm water. Rinse thoroughly, working the water through bristles while gently squeezing to release any remaining cleanser. This step typically requires 2-3 rinses for most brushes, though heavily soiled brushes may need more.
Check for clarity by observing the water running from the brush. Once the water is completely clear with no soap residue, your brush is clean. If you see any cloudiness or feel slickness on the bristles, rinse again.
For large brushes like powder or blush brushes, hold them under running water and gently fan the bristles with your fingers to ensure water reaches all areas. For smaller precision brushes, swirl them in the water stream to ensure thorough rinsing.
Step 5: Gently Squeeze Out Excess Water
After rinsing, remove excess water without damaging bristles. After you clean makeup brushes, gently remove excess water to speed drying without damage.
The gentle squeeze:
Hold your brush vertically with bristles pointing downward. Using a clean, lint-free towel, gently squeeze the bristles from base to tip. Apply light pressure—you’re removing water, not wringing out the brush like a wet cloth.
Alternatively, hold the brush over your sink and let gravity do most of the work. Excess water will drip naturally without requiring aggressive squeezing.
Never shake brushes vigorously or wring them. This forces water into the ferrule and can cause bristle loss. Patience here prevents damage later.
Step 6: Reshape Bristles and Prepare for Drying
Before drying, reshape bristles to their original form. This prevents them from drying in awkward shapes that compromise application quality. Reshaping is part of how you clean makeup brushes to keep their original shape and performance.
Reshaping technique:
While bristles are still damp, use your fingers or a clean comb to gently reshape the bristles to their original form. For round brushes, reshape into a round dome. For flat brushes, reshape into a flat edge. For angled brushes, reform the angle.
This step takes just 10-15 seconds per brush but makes a significant difference in maintaining brush performance. Bristles set while damp, so reshaping now ensures they dry in the correct shape.
For natural hair brushes, you can apply a small amount of hair conditioner or brush conditioning spray at this stage. This adds moisture back to bristles and keeps them soft and pliable. Apply sparingly—you want conditioning, not a heavy coating.
Step 7: Dry Brushes Properly
Proper drying is crucial for preventing mold, mildew, and bristle damage. This is where most people make mistakes. Proper drying is essential; even after you clean makeup brushes, improper drying can ruin them.
Drying methods we’ve tested:
Vertical drying (best method): Place brushes in a cup, jar, or brush holder with bristles pointing downward. This allows water to drip away from the ferrule and prevents moisture from pooling at the base where bristles meet the handle. Brushes dry faster this way and are less prone to mold.
Horizontal drying on a towel: Lay brushes flat on a clean towel with bristles slightly overhanging the edge. This works well for large brushes and allows air circulation underneath. However, it takes longer and increases mold risk if humidity is high.
Angled drying racks: Specialized brush-drying racks hold brushes at an angle, combining benefits of vertical and horizontal drying. These are convenient if you have many brushes, though not essential.
What NOT to do: Never dry brushes bristles-up in a cup (water pools at the ferrule), never use a blow dryer on high heat (damages bristles), and never store wet brushes in a closed container (creates mold conditions).
Drying time:
Most brushes dry within 4-8 hours depending on size, bristle type, and humidity. Larger brushes take longer than small precision brushes. Natural hair brushes typically dry faster than synthetic ones.
For faster drying, ensure good air circulation. A fan or open window helps significantly. In humid climates, drying takes longer—plan accordingly.
Step 8: Store Clean Brushes Properly
Once dry, store brushes in a way that maintains their condition and keeps them clean until next use. How you store brushes after you clean makeup brushes affects their longevity and hygiene.
Storage best practices:
Store brushes upright in a clean container, bristles pointing up. This prevents bristles from bending and keeps them protected from dust and contamination. Avoid storing brushes in closed containers immediately after drying—ensure they’re completely dry first to prevent mold.
Keep brushes away from direct sunlight, extreme heat, and moisture. A cool, dry drawer or shelf works perfectly. If you display brushes in a cup on your vanity, ensure the container is clean and allows air circulation.
For travel, use a brush case or roll to protect bristles from damage and contamination. Ensure brushes are completely dry before packing to prevent mold.
How Often Should You Clean Makeup Brushes?
Cleaning frequency depends on usage and skin sensitivity. Here’s our tested recommendation:
Brushes for liquid or cream products (foundation, concealer, cream blush): Clean weekly. These brushes pick up the most product and bacteria, making frequent cleaning essential.
Brushes for powder products (powder, blush, contour, eyeshadow): Clean every 2-3 weeks. Powder buildup is less bacterial than liquid product, but regular cleaning still prevents skin issues.
Specialty brushes (lip brushes, eyeliner brushes): Clean after every use or at minimum weekly. These small brushes come into contact with sensitive areas and require frequent cleaning.
If you have acne-prone or sensitive skin: Clean all brushes weekly, regardless of product type. The extra cleaning prevents bacterial transfer and significantly reduces breakout risk.
Quick cleaning between deep cleans: For daily use, do a quick rinse under lukewarm water to remove excess product. This extends time between deep cleans and keeps brushes fresher longer.
Pro Tips for Maintaining Makeup Brushes Long-Term
Beyond the basic cleaning routine, these tested strategies extend brush lifespan and maintain performance.
Condition bristles regularly: After deep cleaning, apply a small amount of hair conditioner, brush conditioning spray, or even a drop of argan oil to damp bristles. This restores moisture and keeps natural hair brushes soft. Apply sparingly—you want conditioning, not a greasy coating.
Avoid extreme temperature changes: Don’t move brushes directly from hot water to a cold environment or vice versa. Gradual temperature changes prevent bristle damage and ferrule warping.
Invest in quality brushes: While you don’t need luxury brushes, mid-range options from reputable brands last significantly longer than ultra-cheap alternatives. Quality bristles withstand regular cleaning better and maintain their shape longer.
Replace worn-out brushes: Eventually, even well-maintained brushes show signs of wear—bristles shed excessively, shapes won’t reform, or performance declines. When this happens, replace the brush. Continuing to use damaged brushes compromises makeup application and potentially irritates skin.
Use separate brushes for different products: Avoid using the same brush for multiple products without cleaning between applications. This prevents color mixing and reduces bacterial transfer.
Keep a backup set: If possible, maintain two sets of brushes—one in use while the other dries. This prevents rushing the drying process and ensures you always have clean brushes available.
Common Mistakes to Avoid
Our testing revealed several mistakes people consistently make when cleaning brushes:
Using water that’s too hot: Hot water damages bristles and loosens the glue holding them in the ferrule. Always use lukewarm water—test temperature on your wrist first.
Soaking brushes: Extended soaking forces water into the ferrule, causing bristle loss and handle damage. Quick rinsing and cleansing are equally effective and safer.
Storing wet brushes: Storing brushes while damp creates ideal conditions for mold and mildew. Always ensure complete dryness before storage.
Using harsh cleaners: Dish soap, antibacterial soap, and harsh chemicals strip bristles and cause premature damage. Stick with gentle cleansers designed for hair or skin.
Drying brushes bristles-up: This common mistake allows water to pool at the ferrule, promoting mold growth and bristle loss. Always dry with bristles pointing down or horizontally on a towel.
Ignoring the ferrule: The ferrule (metal part) also needs cleaning. Dried product accumulates here and can harbor bacteria. Include the ferrule in your cleaning routine.
Cleaning too aggressively: While agitation helps remove product, excessive scrubbing damages bristles. Use gentle, circular motions rather than hard scrubbing.
Cleaning Different Brush Types
Different brushes have unique characteristics requiring slightly adjusted techniques:
Natural hair brushes (goat, squirrel, sable): These are delicate and require extra care. Use gentle cleansing motions, condition after cleaning, and dry slowly. They’re worth the extra attention because they provide superior blending and application quality.
Synthetic brushes: More durable than natural hair and can withstand slightly more aggressive cleaning. However, avoid excessive force that can still damage bristles.
Large brushes (powder, blush, bronzer): These require longer cleaning and drying times. Spend extra time during the agitation step to ensure product is fully removed from deep within the bristles.
Small precision brushes (eyeshadow, eyeliner, lip): These require quick, gentle cleaning. Their small size means water and cleanser penetrate quickly, so you don’t need extended agitation.
Stippling or textured brushes: These specialty brushes have unique bristle patterns designed for specific techniques. Clean them thoroughly but gently, as their structure is more delicate than standard brushes.
Connecting Brush Care to Overall Skincare
Clean brushes are part of a broader skincare routine. If you’re investing time in proper brush maintenance, you likely care about the products you’re applying with those brushes. At Unbias Review, we’ve tested numerous skincare and beauty products to help you make informed choices.
For instance, if you’re concerned about breakouts from dirty brushes, you might also be interested in our tested recommendations for the best vitamin C serum we’ve tested this year or our comparison of Cerave vs La Roche Posay cleansers. Proper cleansing—both of brushes and skin—works together to maintain clear, healthy skin.
If you’re using specialty skincare products like La Roche Posay Cicaplast B5, clean brushes ensure these products are applied hygienically and effectively. Similarly, if you’re applying our favorite SPF 50 that doesn’t leave a white cast, clean brushes prevent contamination and ensure even application.
For more comprehensive beauty product reviews and testing, explore our Beauty category where we’ve tested everything from skincare to makeup tools.
Testing Brush Cleaners: What We Found
We tested multiple brush-cleaning products to determine which deliver the best results. According to How to Clean Makeup Brushes Quick and Easy from RMS Beauty, dedicated brush cleansers are specifically formulated for this purpose, and our testing confirmed this.
Dedicated brush cleansers cleaned more effectively than generic alternatives in our tests. However, baby shampoo performed nearly as well at a fraction of the cost, making it an excellent budget option. For people with sensitive skin or those concerned about product buildup, dedicated cleansers offered slightly better results.
The difference between products was minimal enough that consistency and proper technique matter more than the specific cleanser chosen. This means you can select based on budget and availability without compromising results.
Expert Advice on Brush Maintenance
Professional makeup artists emphasize brush care as essential to their craft. According to How to Clean Makeup Brushes, According to Makeup Artists from Allure, professionals clean brushes far more frequently than casual users—often daily or between clients.
Their reasoning is simple: clean brushes perform better, blend more smoothly, and apply makeup more evenly. Additionally, professionals understand that dirty brushes compromise their reputation and client satisfaction. This professional standard translates directly to personal use—clean brushes simply perform better.
Makeup artists also emphasize the importance of proper drying. According to How to Clean Makeup Brushes the Right Way from Byrdie, improper drying is the leading cause of brush damage among casual users. Taking time to dry brushes correctly prevents the majority of brush-related problems.
Health and Hygiene Considerations
Beyond aesthetics and performance, brush cleanliness directly impacts skin health. Dirty brushes transfer bacteria, fungi, and other microorganisms to your face, increasing risk of acne, infections, and irritation.
According to How to Clean Makeup Brushes from Good Housekeeping, consumer testing shows that makeup brushes harbor significantly more bacteria than most people realize. Regular cleaning dramatically reduces bacterial load and associated skin problems.
For people with acne-prone, sensitive, or compromised skin barriers, brush cleanliness becomes even more critical. Dirty brushes can exacerbate existing skin conditions and trigger new breakouts. Establishing a consistent cleaning routine is one of the simplest ways to protect skin health.
Addressing Brush Shedding During Cleaning
Some bristle loss during cleaning is normal, but excessive shedding indicates a problem. We’ve tested various approaches to minimize shedding:
Causes of excessive shedding:
- Water entering the ferrule (the most common cause)
- Using water that’s too hot
- Aggressive scrubbing or wringing
- Poor-quality brushes with weak glue
- Age-related wear on older brushes
Prevention strategies:
- Always rinse with bristles pointing downward
- Use lukewarm water, never hot
- Apply gentle pressure during cleaning
- Invest in quality brushes from reputable brands
- Replace brushes when shedding becomes excessive
Minor shedding (1-2 bristles per cleaning) is normal and not cause for concern. However, if you’re losing 5+ bristles per cleaning, your brushes may be damaged or poor quality. Consider replacing them.
Quick Cleaning Method for Busy Days
Not everyone has time for a full deep-clean routine every week. We’ve tested a quick-cleaning method that maintains brush hygiene between deep cleans:
Quick clean (5 minutes total):
- Rinse brush under lukewarm water to remove excess product
- Apply a small amount of cleanser to your palm
- Swirl brush in cleanser for 10-15 seconds
- Rinse thoroughly until water runs clear
- Gently squeeze out excess water
- Reshape bristles and place in a cup to dry
This quick method removes most product and bacteria without requiring extended drying time. Use it between deep cleans to keep brushes fresher longer. Perform a full deep-clean routine at least every 2-3 weeks regardless of quick cleaning frequency.
When to Replace Your Brushes
Even with perfect care, brushes eventually wear out. Signs it’s time to replace:
- Excessive shedding: More than 5-10 bristles per cleaning indicates structural failure
- Bristles won’t hold shape: If reshaped bristles immediately fall back to an incorrect shape, the brush is damaged
- Poor application quality: If the brush no longer blends or applies makeup smoothly despite being clean
- Bristle damage: Visible fraying, splitting, or breaking indicates the brush is beyond repair
- Age: Most quality brushes last 1-3 years with proper care; synthetic brushes may last longer
When replacing brushes, consider investing in slightly higher-quality options. Mid-range brushes from reputable brands last significantly longer than ultra-cheap alternatives, making them better long-term investments.
Conclusion: Establishing Your Brush-Cleaning Routine
Proper brush cleaning is straightforward once you understand the process and establish a consistent routine. The seven-step method outlined here—rinsing, cleansing, agitating, rinsing again, squeezing, reshaping, and drying—addresses every aspect of brush maintenance. If you make time to clean makeup brushes, you’ll notice better skin and makeup finish.
Key takeaways:
- Clean brushes weekly for liquid products, every 2-3 weeks for powder products
- Use lukewarm water and gentle cleansers; avoid harsh products and extreme temperatures
- Always dry with bristles pointing downward to prevent water from entering the ferrule
- Reshape bristles while damp to maintain their original form
- Store clean, dry brushes upright in a cool, dry location
- Condition natural hair brushes occasionally to maintain softness
- Replace brushes when they show signs of excessive wear
Establishing this routine takes just 5-10 minutes per cleaning session, yet delivers significant benefits: clearer skin, better makeup application, extended brush lifespan, and improved overall beauty routine quality.
According to How to Clean Makeup Brushes from ELLE, maintaining clean brushes is one of the most overlooked yet impactful aspects of a beauty routine. By implementing the tested routine outlined here, you’re investing in both your skin health and the longevity of your beauty tools.
For more comprehensive beauty product testing and reviews, visit our Beauty section at Unbias Review. We’ve tested everything from cleansers to specialized beauty tools, all with the same commitment to honest, unbiased evaluation that guides this brush-cleaning guide.
Start your brush-cleaning routine today, and experience the difference that clean, well-maintained brushes make in your makeup application and skin health. Your skin will thank you, and your brushes will last years longer than they would with neglect.